Sharepoint
Page updated: 04/09/2025
The data you had in the Council File Plan will be in the cloud (online) and you will need to use a web browser,
preferably Edge 

to access your files and folders. You will be able to access all the SharePoint sites that you have permissions to access here CFP Online - Hub - Home (sharepoint.com) you can either save this page to Favourites in Edge or drag and drop from the address bar to your desktop. You can also do this with your favourite SharePoint sites.

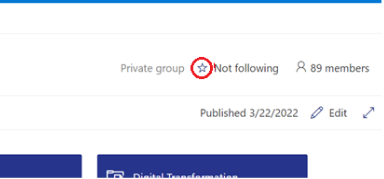
You should also click on the star in your SharePoint Site to follow it
Document libraries are the equivalent of second level folders in the Council File Plan and will look like this:
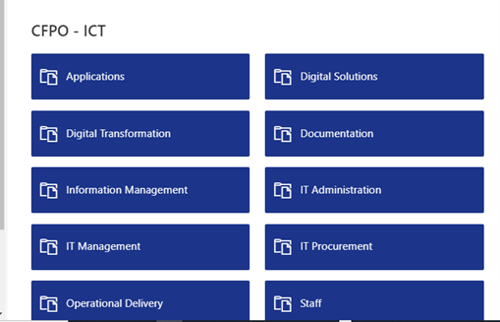
Once you click on any Document Library button the format will look and feel more familiar.
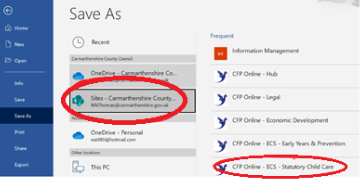
Click File and Save As and select the SharePoint site you require (you will need to have entered the Site before it appears as a Save As option):

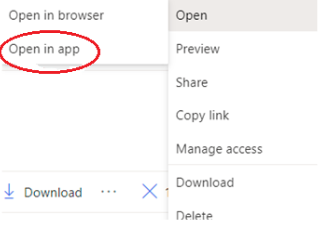
Either double click on the document or click on the three dots (ellipsis) on the right to the document


Hover over Open and select Open in App (if you don’t Open in App you may not have all of the functions that you need in the online version)
Drag and drop emails to SharePoint folders. Emails saved in SharePoint initially open in the browser. If you want to view attachments in an email you will need to download the message.

Open attachment
- File, Save As and navigate to your SharePoint Site
- In the email click Attach File as you would usually do
- Either select the file from Recent Items (if it is a recent file you have worked on)
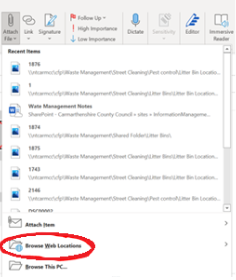
Or select Browse Web Locations
Click on one of the folders that’s in your SharePoint Site
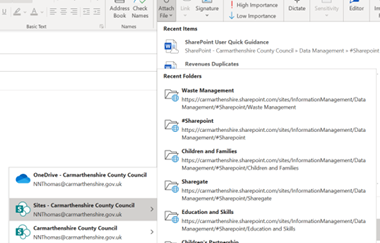
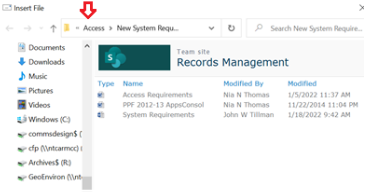
Click here to go up a level
Click on the three dots (ellipsis) on the right to the document or folder and Copy link
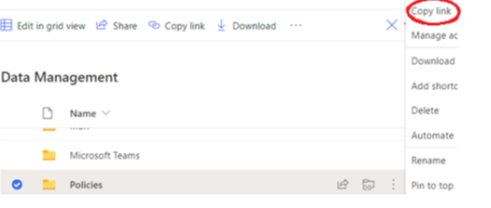
And click on Copy and then paste to Teams chat or email
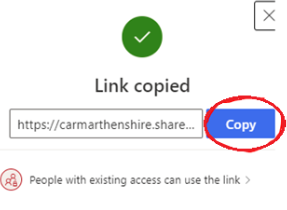
Click on the three dots (ellipsis) on the right to the document and click Share.
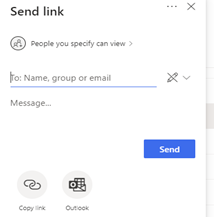
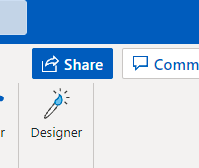
Insert recipient and message and Send. The recipient will receive an email. You can also click on Share when you’re in a document:
Please note that you can only share links with those who currently have access to the document or folder. Only your Site Administrators can share with staff who currently don’t have access.
Click on Upload in the SharePoint menu bar

Click on the dropdown to select a recently visited CFP location and navigate to the required file or folder to upload.

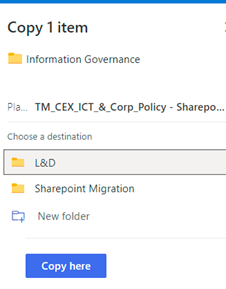
Click on the three dots (ellipsis) on the right to the document and click Copy to.

Select the required Teams site (they will have the prefix TM_)
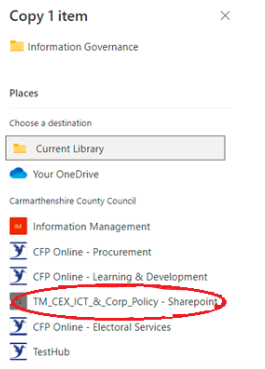
Select the destination and click Copy here
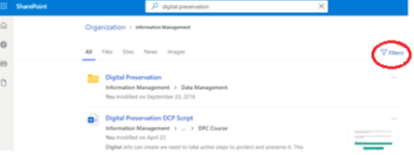
Type in keyword in the Search bar and hit Enter

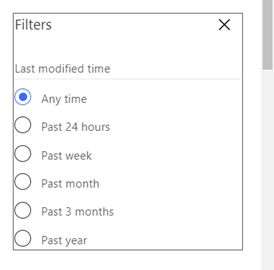
The results will contain files and folders with the keyword in their content as well as their title. You can filter the results by date modified by clicking on the Filter button:
You will find that searching and filtering within a Document Library is slightly different.
You can filter files and folders before and after searching by clicking on the Filter button

You can filter by date modified, by who, and file format.
Versions
From the ellipsis menu version history of documents (since they’ve been in SharePoint) and view the previous versions. This can be turned off if not needed.
File Properties
When you’ve selected a file you can see its Properties on the right hand pane, you can scroll down to see what activity there has been on the file.
Collaboration
With SharePoint, multiple people can work together on a Word document, Excel spreadsheet, or PowerPoint presentation. recommended maximum of concurrent editors is 10. The boundary limit (I.e. what cannot be exceeded) is 99. There is no upper limit on OneNote authors.
When 2 or more users edit the document at the same time, they get to see “each other’s presence” and changes as they happen live
You can see who else is editing a document.
Alerts to Changes
Again from the ellipsis menu you can create alerts for when a file or folder has been modified or deleted. When you create an alert you will receive an email to notify you of the changes. Be careful of how you use this feature as you may end up being inundated with notifications.
Recycle Bin
Unlike your PC’s Recycle Bin, SharePoint Recycle Bin can store not just files and folders. It is a catch-all place for any user-created content that was deleted. That includes documents, folders, whole document libraries, SharePoint lists and even complete sites. So in other words, whether you delete a document from a document library, an event from a calendar, task from a task list, contact from a contacts list or even the whole SharePoint Site – they will all end up in SharePoint Recycle Bin. They will remain in the Recycle Bin for 31 days.
In SharePoint, you experience one or more of the following problem scenarios:
- Scenario 1: You're missing a file, folder.
- Scenario 2: You've deleted a file or a folder and want to recover it.
Solution
- Search within the Document Library where the file or folder was located. The file or folder may have been accidently or deliberately moved. Insert part of a file or folder name. You can also use a wild card search, that is when you don’t know exact keywords, only a portion of the text you are looking for (i.e. first few letters). The wildcard character in SharePoint is *. You have to start with the first few letters of the word. In other words, in a word “vehicle”, you can’t search for text “ehic“, it has to be “veh“.

If the file can’t be found within the Document Library then search the Site by clicking on the Expand search to all items in this site at the bottom of the page to search the whole Site.

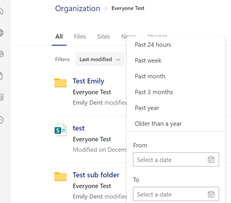
Here you can filter by file format e.g. Word document and by last modified.
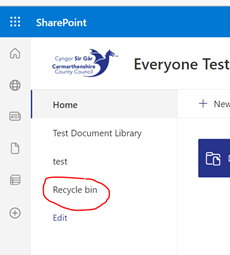
2. If you fail to find your file or folder by searching you can check whether the item is in the recycle bin for the SharePoint Site. Items stay in the Recycle bin for 30 days.
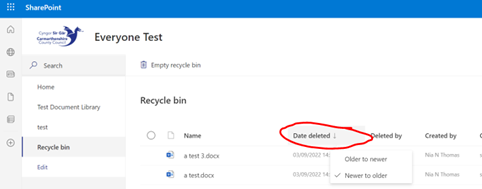
You can rearrange columns’ order
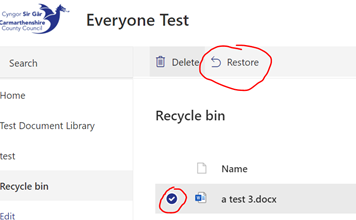
When the lost file or folder is found select it and click Restore
If you still haven’t found your file or folder you will need to contact your Site Administrator.
IT Support
IT Expression of Interest Request
Working Remotely
IT Policies
IT Strategies
IT Security
- Exchange Online Protection
- Windows Security Updates
- Encrypted Emails
- Self Service Password Reset
- Multi Factor Authentication
Print and Scan
Mitel IP Phone Settings and Features
Optimising Home Broadband
Portable Devices
- Mobile Phones
- Bring Your Own Device (BYOD)
- WhatsApp Guidance
- Tethering/Mobile Hot Spot
- Mobile Device Photos - MS One Drive Guide
Install your own software
Web Browsers
More from IT Support
